
With over three billion active users every month, Facebook remains the largest social media platform in the world and one of the most powerful tools available to businesses of any size for building visibility, engaging customers, and driving local discovery. A Facebook business page is free to create, takes about fifteen minutes to set up properly, and gives your business a permanent presence in the place where billions of people spend time every single day. If your business does not have one, it is invisible to an enormous share of the people who might otherwise become your customers.
This guide walks through every step of creating a Facebook business page in 2026, from the initial setup through the optimization that makes the page actually work for your business.
What a Facebook Business Page Is and Why It Differs From a Personal Profile
Before starting the setup process, it helps to understand what a Facebook business page is and how it differs from a personal profile. A personal Facebook profile represents an individual and is subject to Facebook’s limit of one profile per person. A business page is a public profile associated with a business, brand, or organization and has no equivalent limit. Anyone can follow or like a business page without the mutual connection requirement of a personal friendship, which means businesses can reach people they have never interacted with before.
Business pages come with capabilities that personal profiles do not have: the ability to run paid advertising campaigns through Meta Ads Manager, access to Facebook Insights analytics that show how content is performing, the ability to set up a Facebook Shop for e-commerce, integration with Instagram for cross-platform management through Meta Business Suite, and the option to create a Facebook Group connected to the page. These tools make a business page meaningfully more powerful than simply having a personal presence on the platform.
One important technical detail: creating a Facebook business page requires a personal Facebook account on the backend. The personal account is not publicly linked to the page and does not appear on the page, but Facebook requires the connection for administrative purposes. If you do not have a personal Facebook account and prefer not to create one associated with your personal identity, creating a secondary Facebook account with a professional email address is a common approach, though it should be done carefully as Facebook’s terms of service restrict the creation of multiple personal accounts.
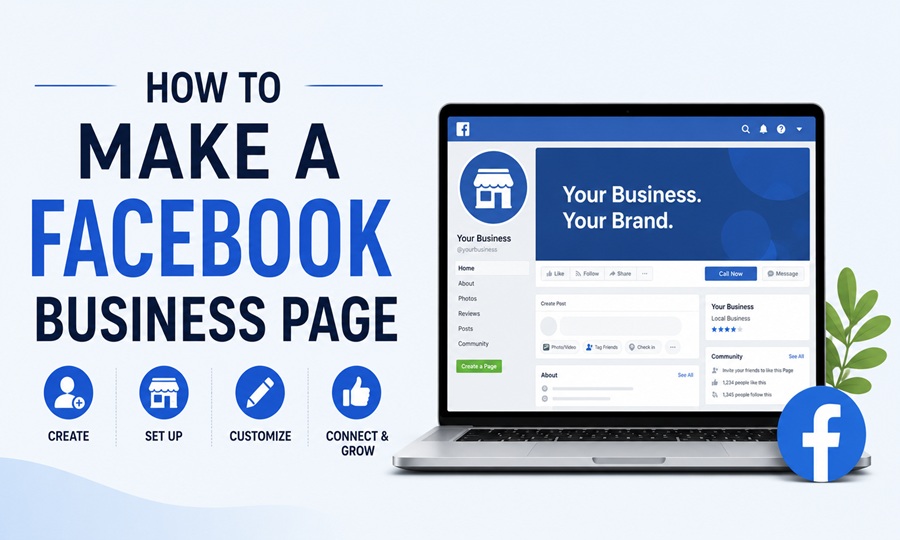
Step One: Start the Page Creation Process
Log into your personal Facebook account and look for the Pages icon in the left-hand navigation panel on the desktop interface. Clicking it takes you to a screen showing any pages you currently manage and a button to create a new page. Alternatively, navigate directly to facebook.com/pages/create in your browser.
On mobile, tap the three-line menu icon in the bottom right corner of the Facebook app, scroll down to Pages, and tap Create New Page.
Click or tap the option to create a new page to begin the setup process.
Step Two: Enter Your Business Name and Category
The first information Facebook requests is your page name and category. Your page name should be your exact business name as customers would search for it. Avoid adding unnecessary keywords, taglines, or location descriptors to the page name itself. Facebook’s search algorithm and your customers will find you more easily when the page name matches the actual business name precisely.
The category field is a search-assisted dropdown where you type your industry and select the most accurate description from the options that appear. You can select up to three categories. Categories help Facebook understand what your business does and surface your page in relevant searches and recommendations. A local bakery might select Bakery, Food and Beverage, and Local Business. A marketing agency might select Marketing Agency, Advertising Agency, and Business Service. Choose the most specific and accurate categories available for your business type.
Step Three: Write Your Page Description
The description field allows up to 255 characters and appears directly below your page name in search results and on the page itself. Write this as a clear, specific statement of what your business does and who it serves rather than a generic tagline. A description that says provides high-quality marketing services is far less useful than one that says helps small businesses in the Chicago area grow through social media management, email marketing, and paid advertising.
The description is often the first substantive thing a visitor reads after finding your page in a search result, so making it concrete and specific increases the probability that the right people recognize your business as relevant to their needs.
Step Four: Add Your Contact Information and Business Details
After clicking Create Page, Facebook walks you through a series of additional setup steps. These include your website URL, phone number, email address, physical address if you have a location customers visit, and your operating hours. Each piece of information adds to the completeness of your page profile, which Facebook rewards with better visibility in local search results.
Your phone number and email address allow customers to contact you directly from the page. Your physical address enables your page to appear in Facebook’s local search results and in Facebook Maps when people nearby are looking for businesses in your category. Operating hours set accurate expectations for customers and are displayed prominently on the page, reducing the friction of someone trying to visit or call outside of business hours.
None of this information is required before the page can go live, but completing it thoroughly produces a significantly more effective page both in terms of search visibility and customer trust.
Step Five: Upload Your Profile Picture and Cover Photo
The visual identity of your Facebook business page communicates credibility and professionalism before a visitor reads a single word of content. Two images are most important: your profile picture and your cover photo.
Your profile picture appears as a circular image next to your page name in search results, in comments and posts made by the page, and as the primary identifying image throughout the platform. Your business logo is almost always the correct choice here. Facebook recommends a minimum size of 170 by 170 pixels for desktop display, with higher-resolution images displaying better across all devices. If your logo is square or rectangular rather than circular, ensure the most important part of the image is centered so it is not cut off by the circular crop.
Your cover photo is the large horizontal image that appears at the top of your page when someone visits it. It is the largest visual real estate on your page and the strongest opportunity to communicate what your business does or what its personality is. Recommended dimensions are 820 pixels wide by 312 pixels tall. Some businesses use this space for their logo in a branded context. Others use it for a photograph of their location, their products, or their team. Still others use it to promote a current offer or highlight a seasonal message. Whatever image you choose, ensure it is high resolution and visually clear on both desktop and mobile, as the crop differs slightly between the two.
Step Six: Complete Your About Section
The About section of your Facebook business page is the most detail-rich part of the page and functions as a reference destination for visitors who want to know more about the business. In addition to the short description added during setup, the About section contains fields for your long-form company description, founding date, company history, mission statement, and additional contact information.
As Meta’s official guidance on optimizing Facebook business pages explains, a complete and accurate About section improves the page’s visibility in Facebook search and increases the confidence of visitors who are evaluating whether to engage with the business. Pages with incomplete or sparse About sections rank lower in Facebook’s local discovery features than pages with comprehensive information.
Write your long-form description with enough detail to explain what your business does, who it serves, what makes it different, and why a prospective customer should choose it. This is not a place to be brief for the sake of brevity. It is the place where an interested visitor comes to learn more, and giving them enough information to make a confident decision about engaging is the goal.
Step Seven: Create Your Username and Vanity URL
Every Facebook business page can have a custom username that creates a clean, memorable URL for the page rather than the default string of numbers Facebook assigns to new pages. A page without a custom username might have a URL like facebook.com/100089234567890. The same page with a username set to your business name has the URL facebook.com/yourbusinessname, which is dramatically easier to share in marketing materials, email signatures, and in conversation.
To set your username, go to your page, click the option to edit or add a username, and enter the name you want to use. Usernames must be unique across the platform, at least five characters long, and contain only alphanumeric characters and periods. Your business name is almost always the right choice. If your exact business name is taken, adding your city or a relevant modifier is a common approach.
Set your username before you promote the page anywhere, as changing it later requires updating all the places the old URL was shared.
Step Eight: Add a Call to Action Button
Facebook business pages include a prominent call to action button that appears near the top of the page. This button is one of the most commercially valuable elements of the page because it gives visitors an immediate, clear path to take the action that matters most to your business.
Available call to action options include Book Now for appointment-based businesses, Contact Us for service inquiries, Shop Now for businesses with a Facebook Shop or external e-commerce store, Call Now to facilitate direct phone contact, Send Message to open a Messenger conversation, Learn More to direct visitors to a website, Sign Up to build an email list or membership, and Watch Video to highlight a key video.
Choose the option that represents the most valuable action a page visitor can take for your specific business. A restaurant benefits most from a Reserve or Book Now button. A service business with strong inquiry-to-conversion rates benefits from Contact Us or Send Message. An e-commerce store benefits from Shop Now.
Step Nine: Connect to Instagram and Meta Business Suite
If your business also maintains an Instagram presence, connecting your Facebook page to your Instagram account through Meta Business Suite enables cross-platform management that saves meaningful time. You can schedule and publish posts to both platforms simultaneously, monitor comments and messages from both in a single unified inbox, run advertising campaigns that span both platforms from one interface, and view combined analytics that give you a complete picture of your social media performance.
To connect Instagram, navigate to your Facebook page settings, find the Instagram option, and follow the prompts to link the accounts. Both accounts must be owned or administered by the same person to complete the connection.
Step Ten: Publish Your First Content Before Promoting the Page
Before you invite customers to like the page or begin any promotional activity, publish at least three to five posts that represent the kind of content the page will regularly produce. A page with no content when a visitor arrives signals that it is either inactive or just getting started, neither of which creates the impression of an established, engaged business.
Your initial posts might include an introduction to the business and team, photographs of your location, products, or services, a behind-the-scenes look at how you operate, customer testimonials or reviews if you have them, or a clear statement of what followers can expect from the page going forward. These initial posts set the expectation for the page and give early visitors a reason to follow.
Once your page has a content foundation, invite your personal Facebook connections to like the page, add the page URL to your website, email signature, Google Business Profile, and any other business listing, and begin the process of building an audience through consistent, valuable content and genuine engagement with the people who interact with the page.